How to Effectively Repair a Leaking Radiator and Restore Optimal Performance
- Aug 22, 2025
- 4 min read
Radiators play a crucial role in the heating system of your home, ensuring that the indoor environment remains warm and comfortable, especially during the colder months. However, a leaking radiator can lead to inefficiency and increase the risk of water damage. Not only does it compromise the heating performance, but it can also escalate energy costs. Fortunately, radiator leak repair is often manageable with some basic tools and a little know-how. This guide will walk you through the steps necessary to fix a leaking radiator effectively.
Identifying the Source of the Leak
Before you begin the repair, it's essential to identify where the leak is originating from. Common areas where radiators leak include:
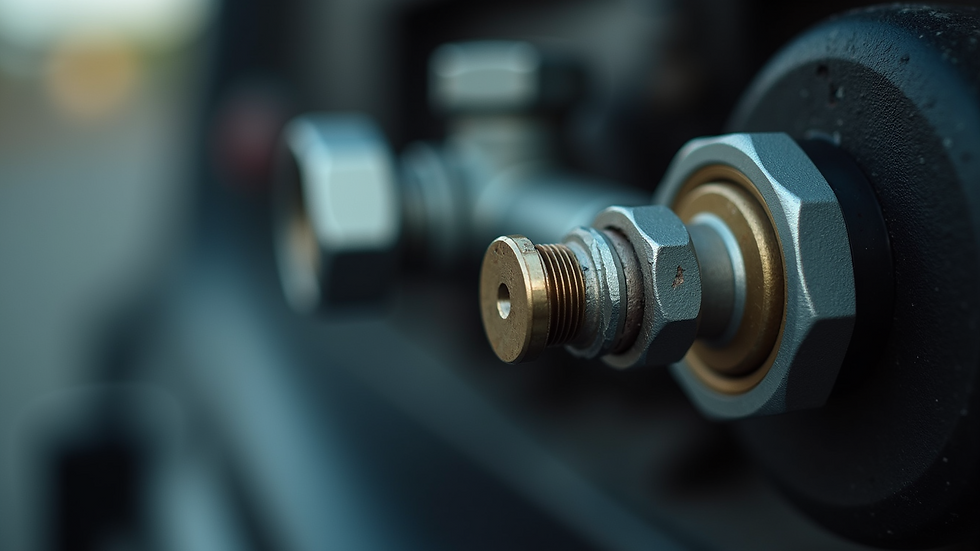
Valves: Check the valves at both ends of the radiator. Loose or damaged valves can often be the cause of a leak.
Seams and Joints: Inspect the points where different sections of the radiator join together.
Body of the Radiator: Look for any corrosion or cracks along the body of the radiator itself.
Taking the time to accurately locate the source of the leak will save you from unnecessary work and will help in determining the most appropriate repair method.
Gathering Necessary Tools and Materials
Once you have identified the leak's origin, gather the necessary tools and materials for the repair. Here’s a basic list of what you might require:
Adjustable wrench
Screwdriver set
Plumber’s tape or Teflon tape
Radiator sealant (if applicable)
Old cloths or towels
Having everything prepared beforehand will streamline the repair process and minimize disruptions.
Preparing the Radiator for Repair
Before carrying out any repairs, it's crucial to turn off the heating system and allow the radiator to cool down completely. Once cool, follow these steps:
Turn Off the Valves: Use the adjustable wrench to close the valves on both ends of the radiator to prevent any water from leaking out during the repair.
Drain the Radiator: Position a bucket or a towel beneath the radiator’s drain valve. Open the drain valve and allow any remaining water to escape.
Clean the Area: Wipe down the area around the leak with old cloths to ensure that you have a clear workspace. A clean area will also help seal the leak more effectively.
Repairing Minor Leaks
For minor leaks, you can often fix the problem using plumber's tape or radiator sealant. Here’s how to do it:
Using Plumber’s Tape
Wrap the Valve: If the leak is coming from a valve joint, wrap plumber's tape around the threads of the valve. Ensure it's wrapped sufficiently, as this will help create a watertight seal.
Replace the Valve: If wrapping does not solve the problem, consider replacing the valve entirely. Unscrew the old valve with an adjustable wrench and install a new one, using plumber’s tape on the threads of the new valve for a secure fit.
Using Radiator Sealant
Consult the Instructions: If your leak is more significant and requires sealant, procure a radiator sealant that is compatible with your type of radiator.
Apply the Sealant: Follow the manufacturer’s instructions to apply the sealant at the leak site. Most sealants will require you to shake the product well before application.
Allow to Cure: Give the sealant the recommended amount of time to cure before refilling the radiator.

Fixing Major Leaks
In some cases, the leak may be too considerable for tape or sealant to manage. If this is the case, a more involved repair or replacement may be necessary.
Assessing Damage
Check for Corrosion or Major Cracks: If the radiator itself is heavily corroded or if you discover substantial cracks, you may need to replace the entire unit.
Consider Professional Help: If you’re unsure about the damage or how to proceed with repairs, consulting a professional plumber is advisable.
Replacing the Radiator
If the decision is made to replace the radiator, follow these instructions:
Remove the Old Radiator: Turn off the water supply, drain the old radiator completely, and detach it from the wall brackets and any connecting pipes.
Install the New Radiator: Position the new radiator in place, ensuring all fittings are tight and secure. Reattach the valves and make sure the connections are sealed with plumber's tape.
Refill and Test: Once the new radiator is in place, refill it with water and turn on the heating system. Monitor the new radiator for any signs of leaks as it warms up.
Regular Maintenance to Prevent Future Leaks
After fixing or replacing your radiator, it's vital to maintain it properly to avoid future leaks. Here are some preventative maintenance tips:
Regular Inspection: Periodically check your radiator for any signs of leaks or wear and tear.
Bleed the Radiator: Air can accumulate in the heating system, causing pressure to build and potentially leading to leaks. Regularly bleed the radiator to release trapped air.
Check Valves and Connections: Inspect the valves and connections for tightness and any buildup of corrosion.
Keep It Clean: Dust and debris can accumulate on radiators, affecting their efficiency. Clean them regularly to maintain optimal performance.
Conclusion
Repairing a leaking radiator can not only save you money but also ensure that your home remains warm and comfortable throughout the colder months. Whether dealing with minor or major leaks, understanding the source of the problem and having the right tools on hand is essential.
By following the steps outlined in this guide, you should be well-equipped to address common radiator issues. Regular maintenance and care will also go a long way in preventing future leaks. If you ever find yourself in doubt, don’t hesitate to consult with a professional to maintain the efficiency of your home heating system.


Comments